Organizing files
Upload, folders, stars, color labels, and acting on many files at once.
As a vault fills up, finding a file matters more than storing it. This page covers the tools that keep yours navigable: uploading, folders, stars, colors, and bulk actions.
Uploading
Click Upload (or press Ctrl/Cmd + U) to open the upload dialog. Drag files onto it, or pick them with Select Files — Select Folder brings in a whole folder at once. You can upload up to 1000 files in one go, at up to 1 GB each, and any file type is accepted.
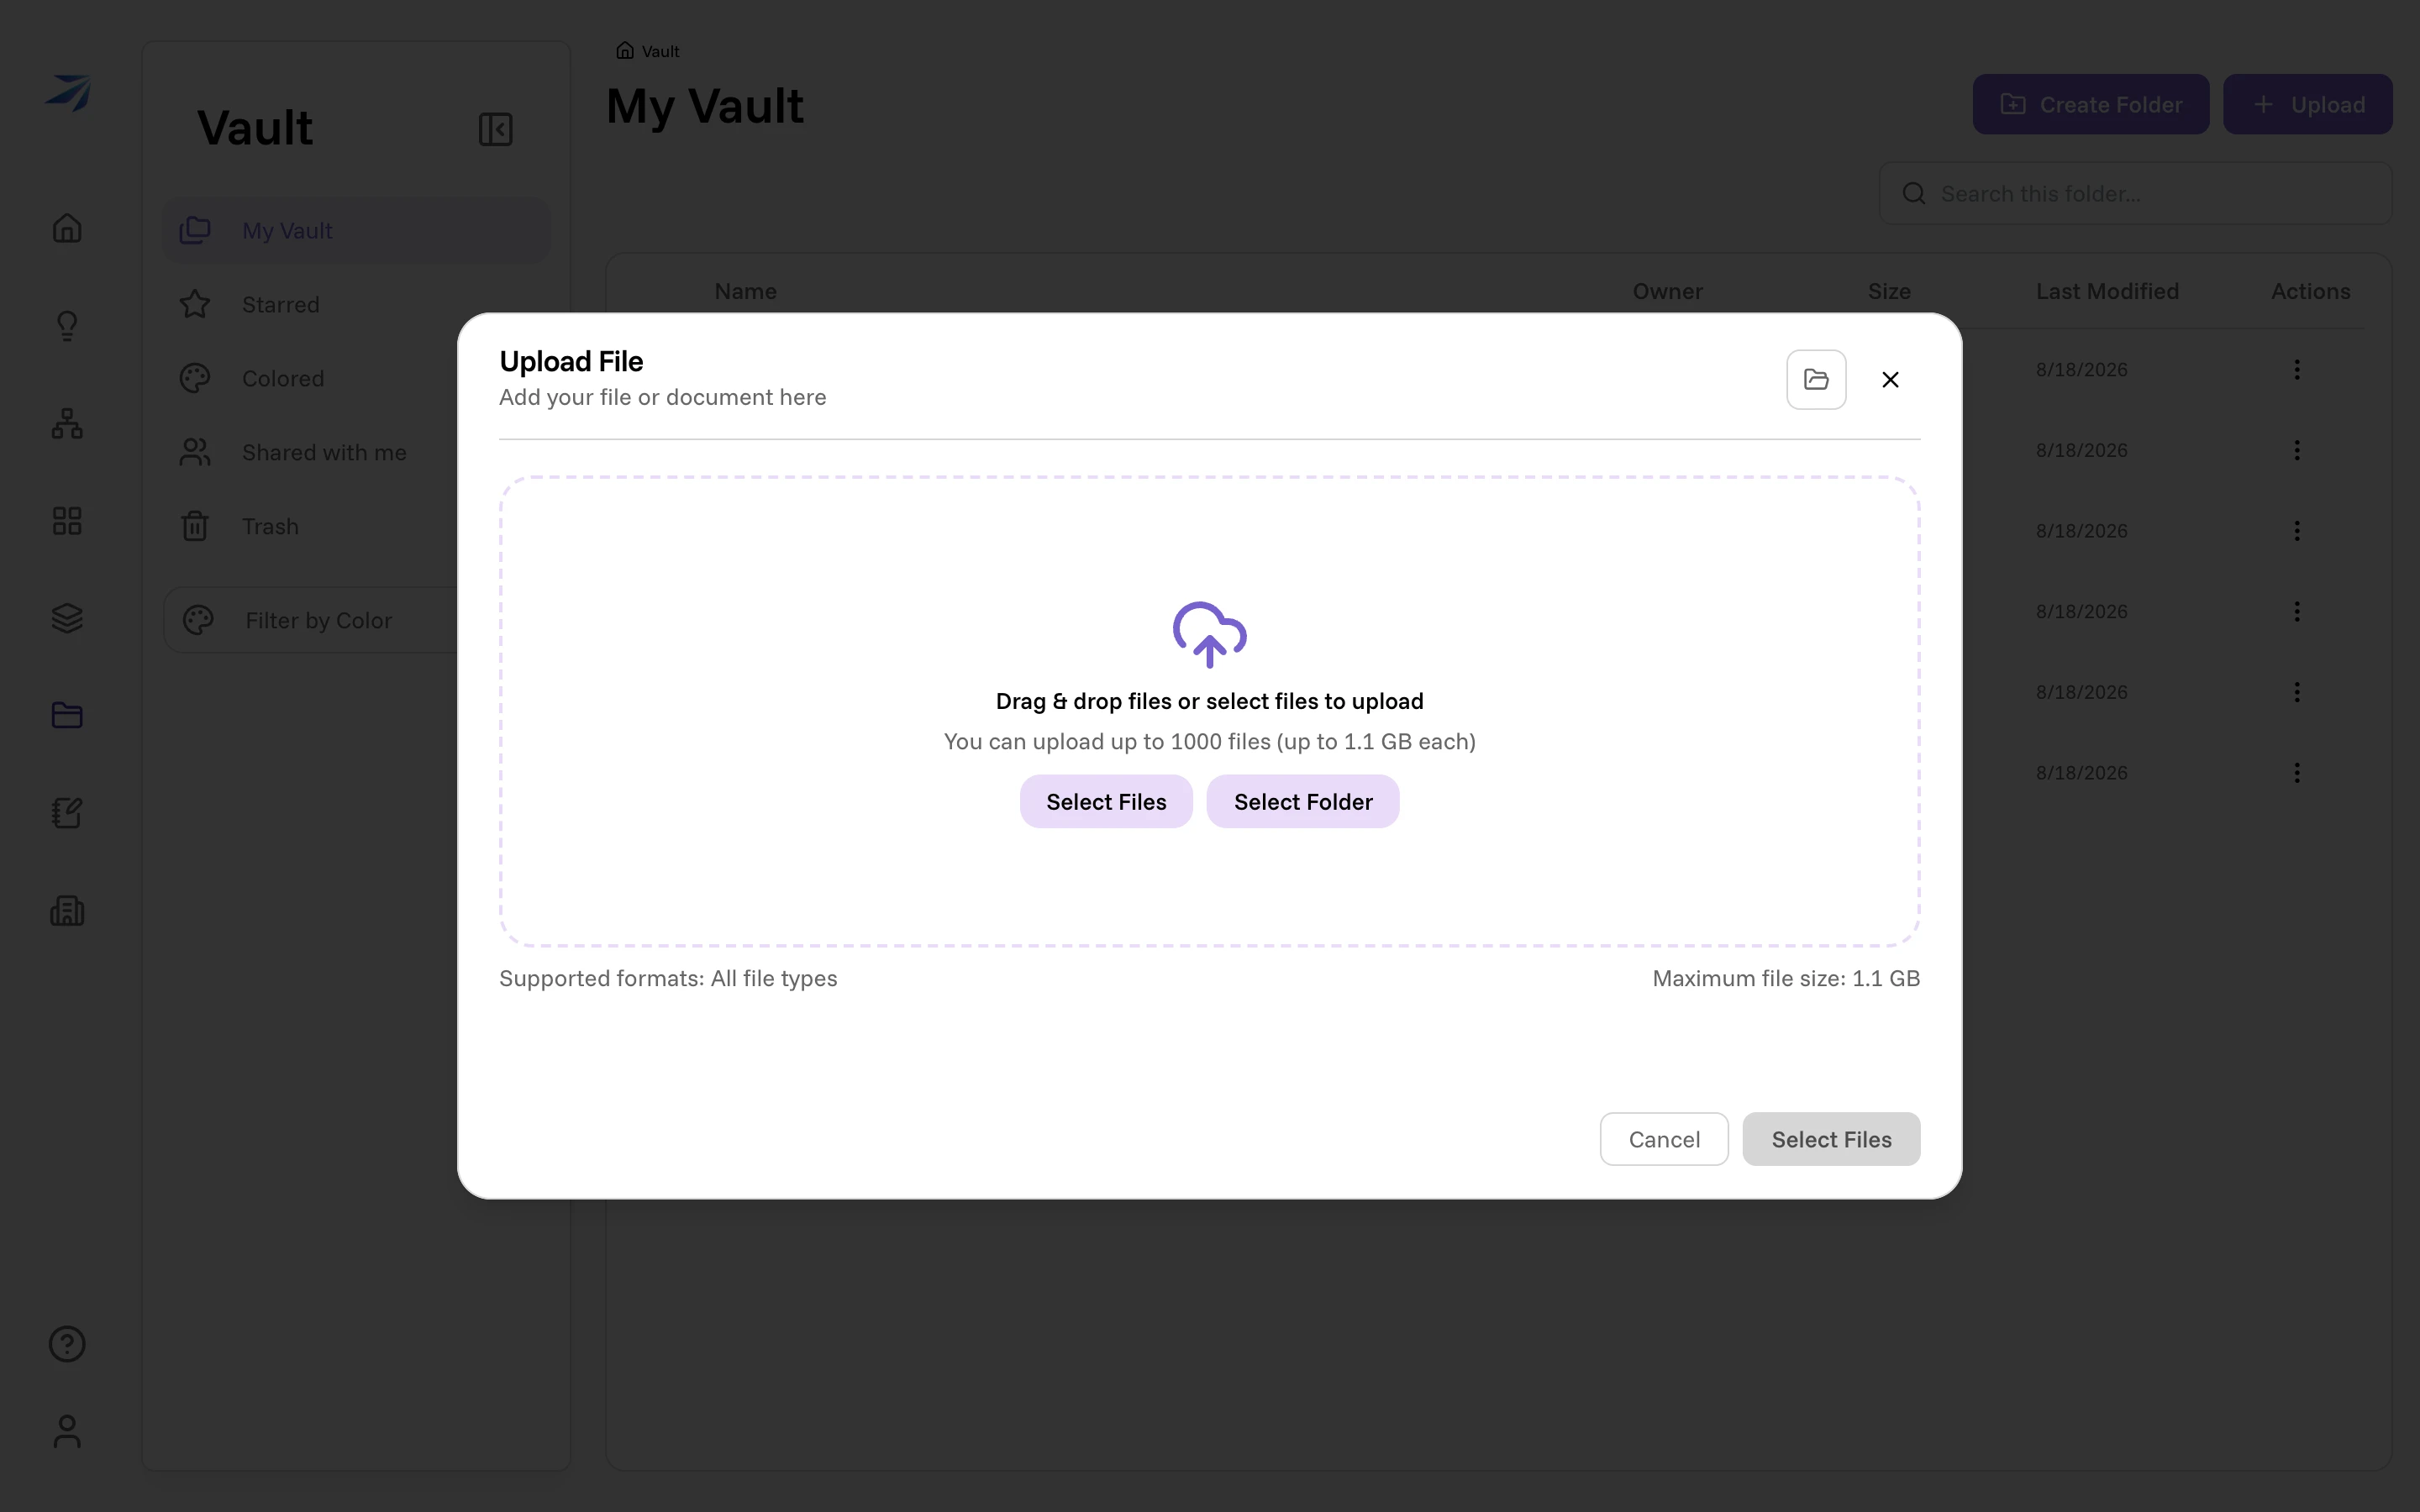
After the upload, Futurity processes each document in the background — that's what makes the contents readable to Corint later. A small status indicator sits on the file's row until processing finishes; you rarely need to wait for it.
Large uploads may take longer to process. Futurity limits concurrent indexing requests and processes each document's text in batches. If processing fails after automatic retries, the uploaded file stays in the Vault. Right-click the file and choose Process Now to try again. Search indexing is ready once the file finishes processing.
Folders
Create Folder (or Ctrl/Cmd + Shift +
N) makes a folder in whatever folder you're looking at. Double-click to enter one, use the breadcrumb or Back to leave. To move items later, right-click and choose Move to..., which lets you pick the destination folder.
The right-click menu
Almost everything on this page lives one right-click away. Select a file and right-click it:
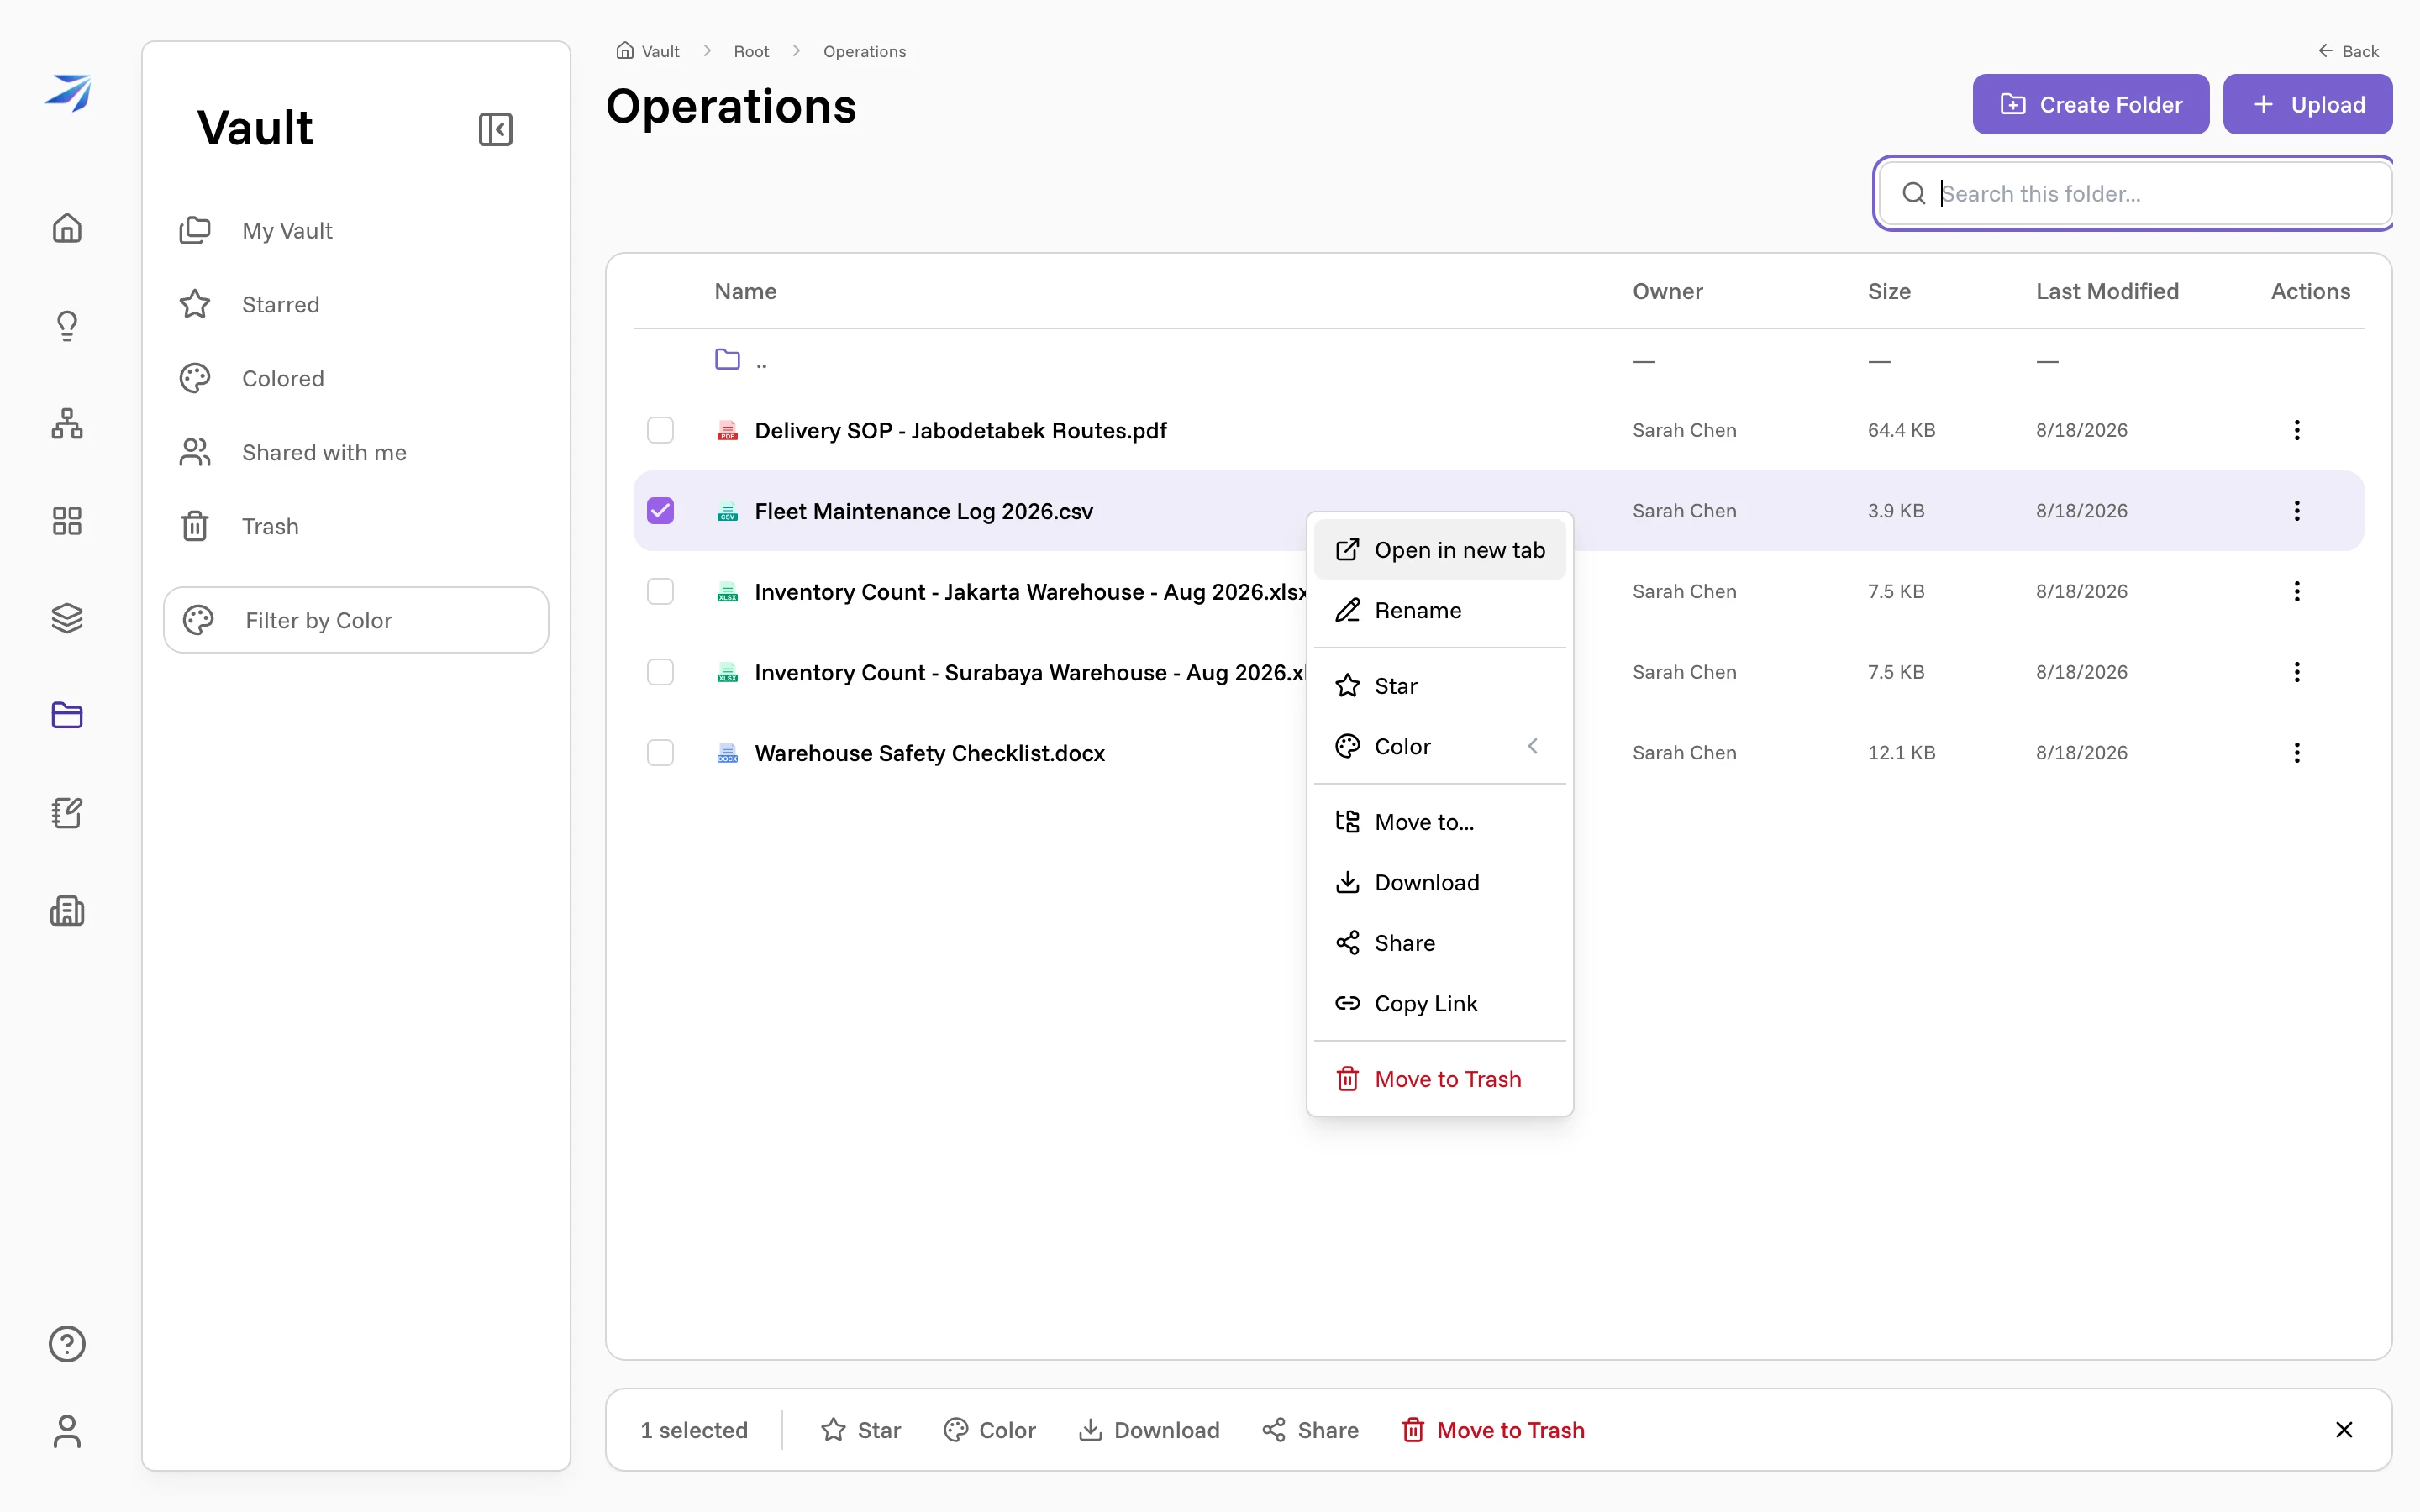
- Rename — change the name in place.
- Star — add it to your Starred view (it becomes Unstar once starred).
- Color — pick from sixteen swatches, a pastel row and a strong row.
- Move to..., Download, Share, Copy Link, Move to Trash — what they say.
Right-clicking empty space in a folder offers New Folder and Upload Files instead.
Color labels
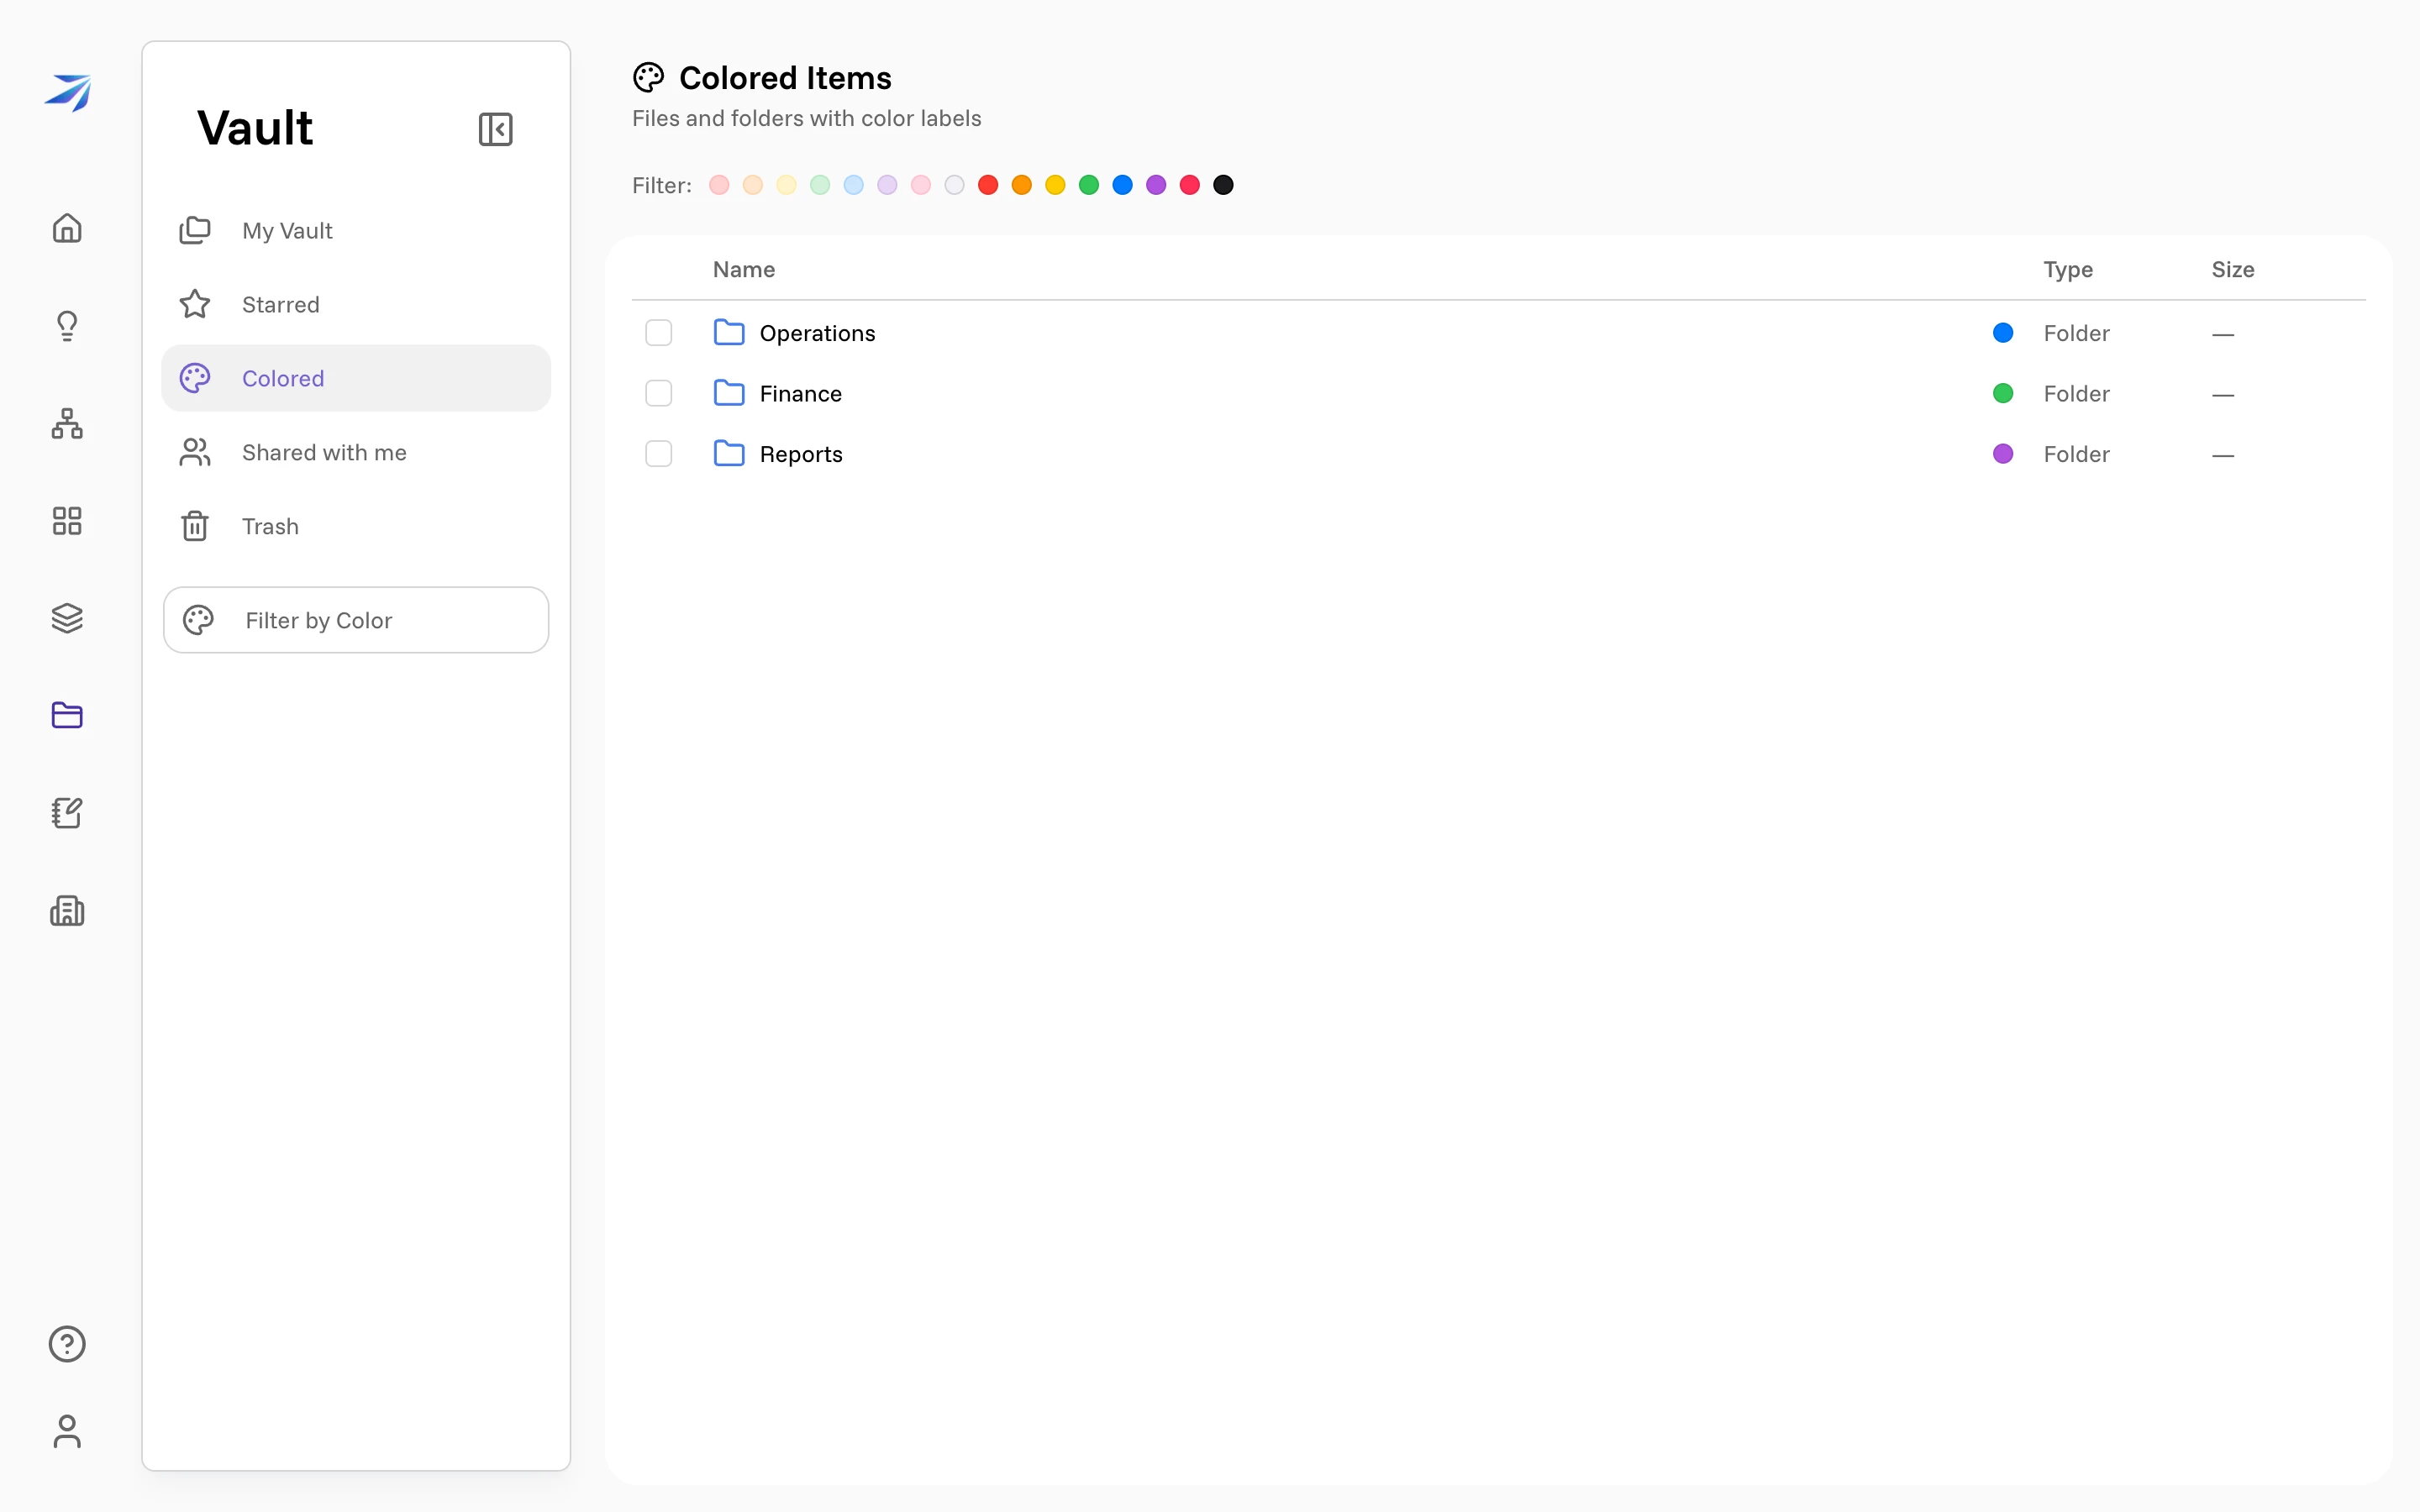
Colors are a second axis of organization that ignores folder boundaries. A common pattern: one color for "needs review", another for "final". Set a color from the right-click menu, and the dot appears on the row wherever the item shows up.
Every colored item is collected in the Colored view, with a filter row of all sixteen swatches at the top:
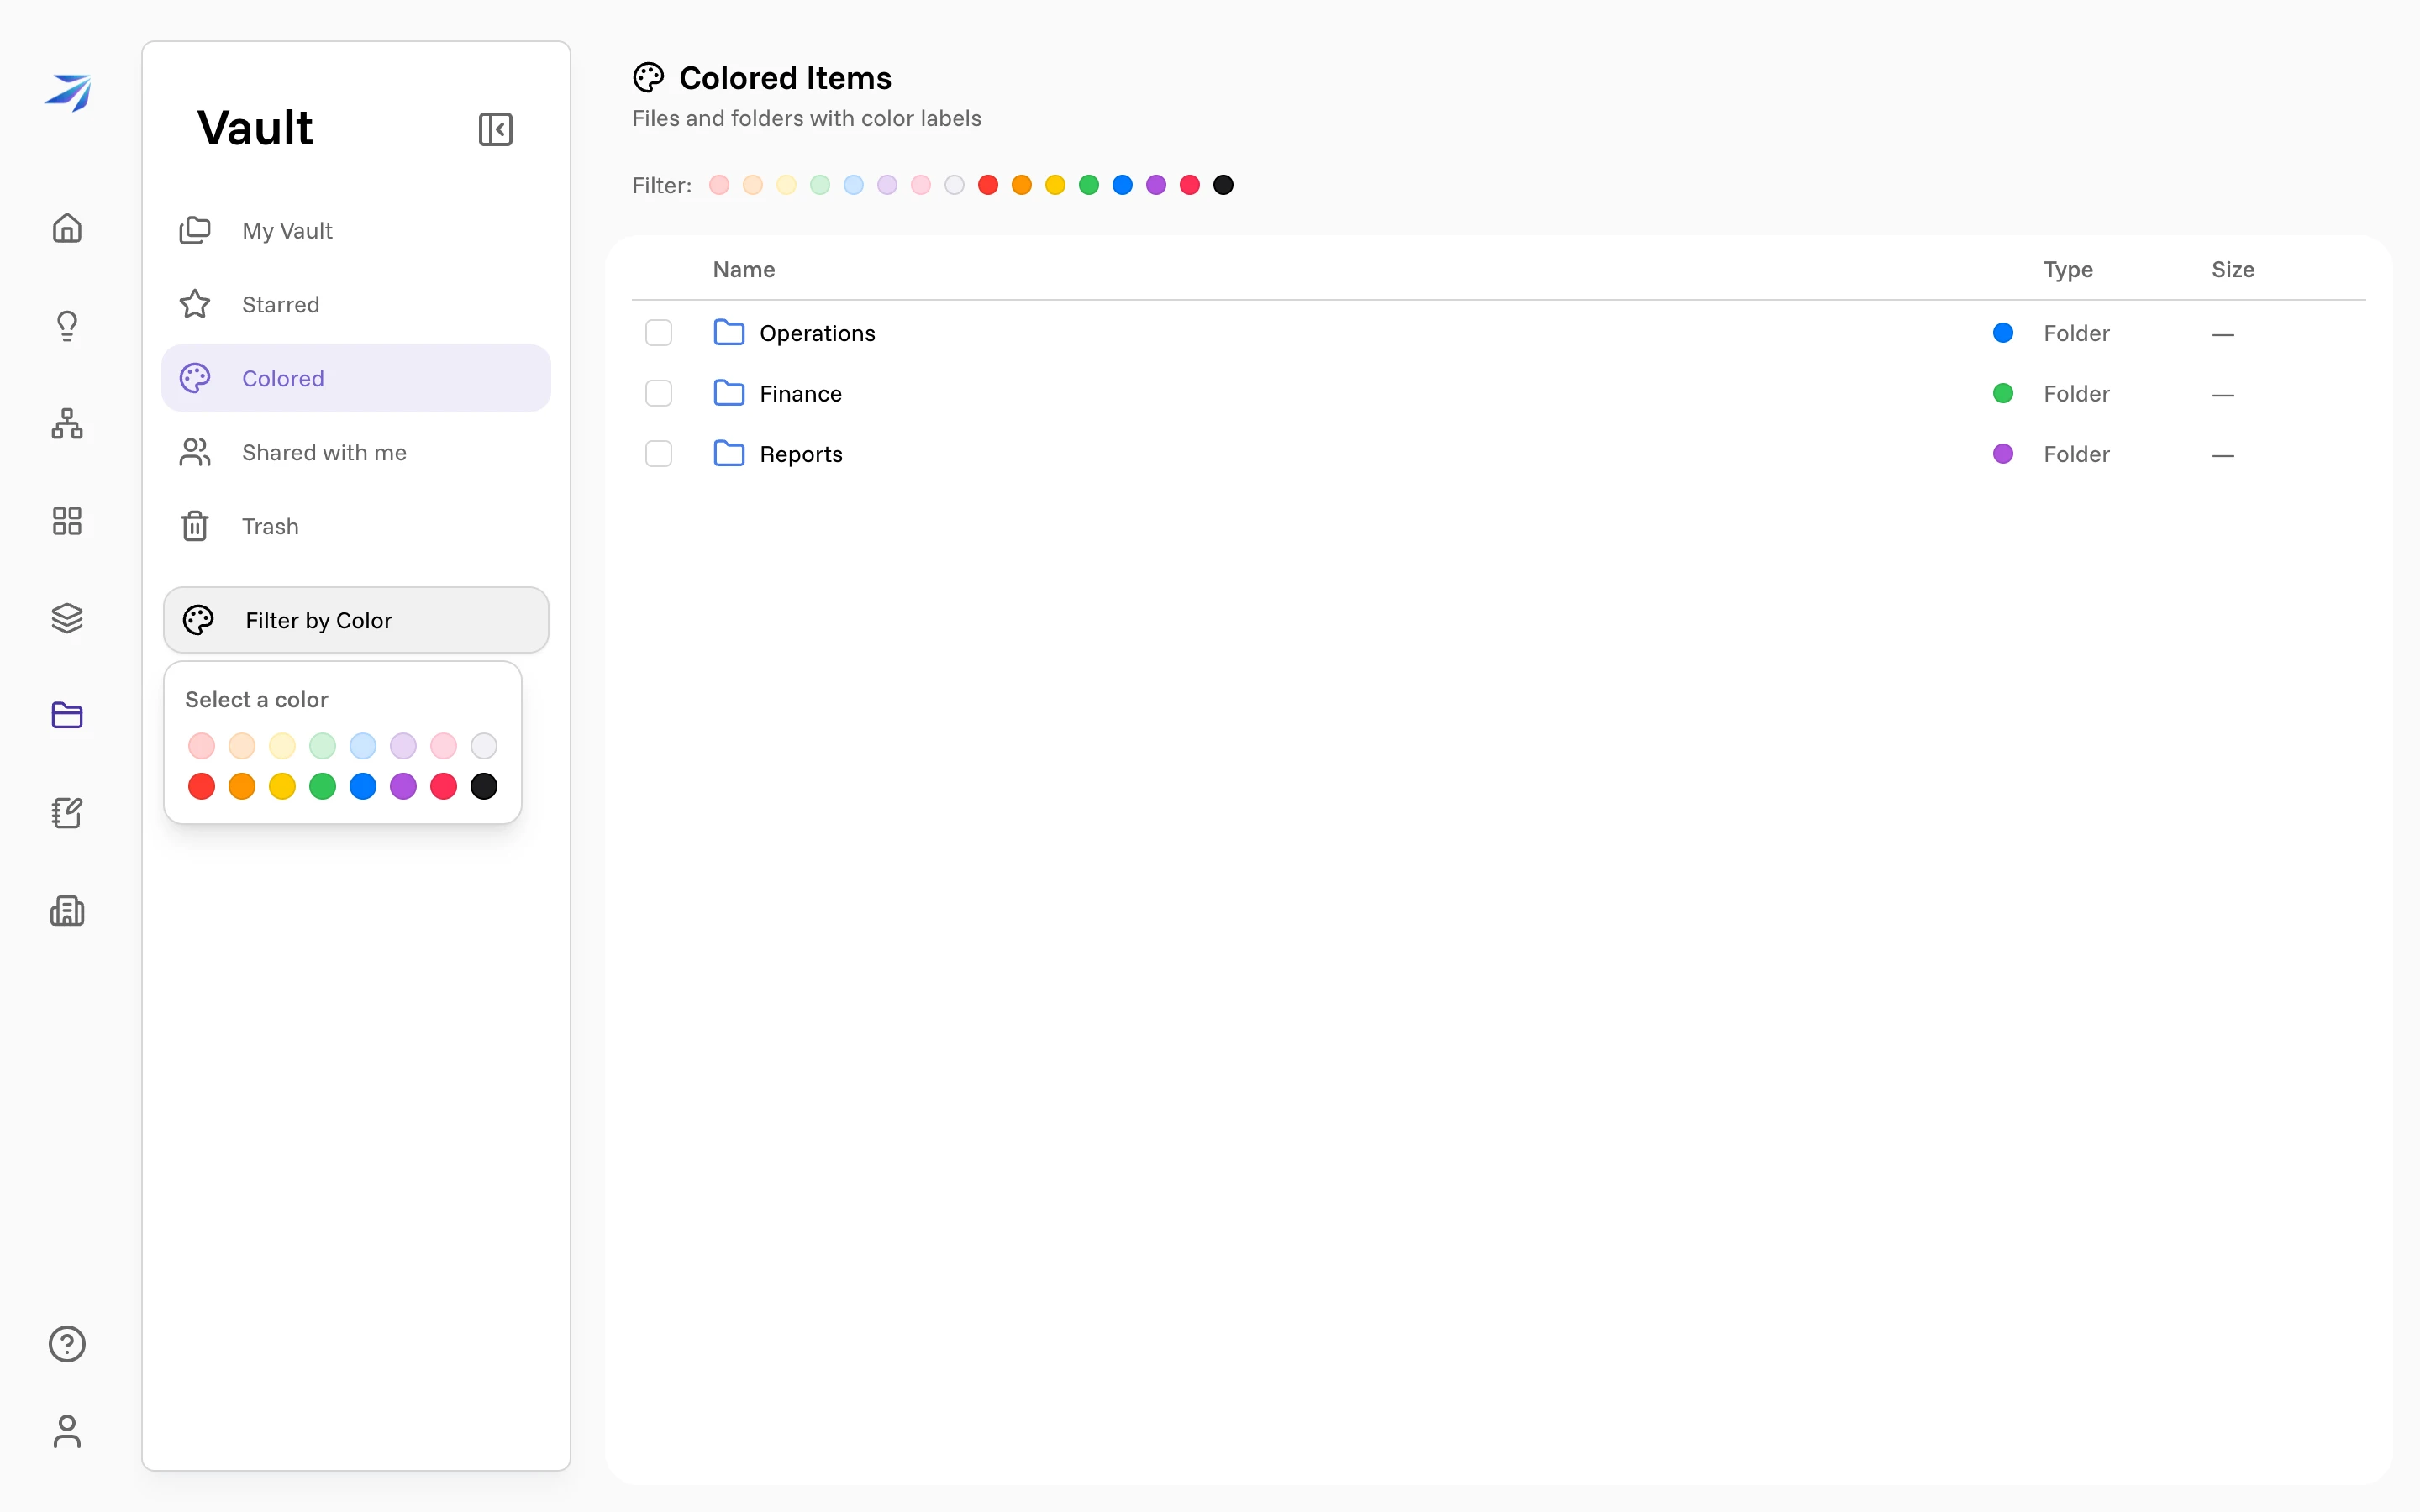
Filter by Color in the sidebar does the same job from anywhere — pick a swatch and you land on the Colored view already filtered to that color.
Acting on many files at once
Tick the checkboxes on several rows (or click rows to select them) and a toolbar appears along the bottom with the count and the actions that make sense for a group: Star, Color, Download, Share, Move to Trash — and with more than one item selected, New Folder, which creates a folder and moves the selection into it in one step.
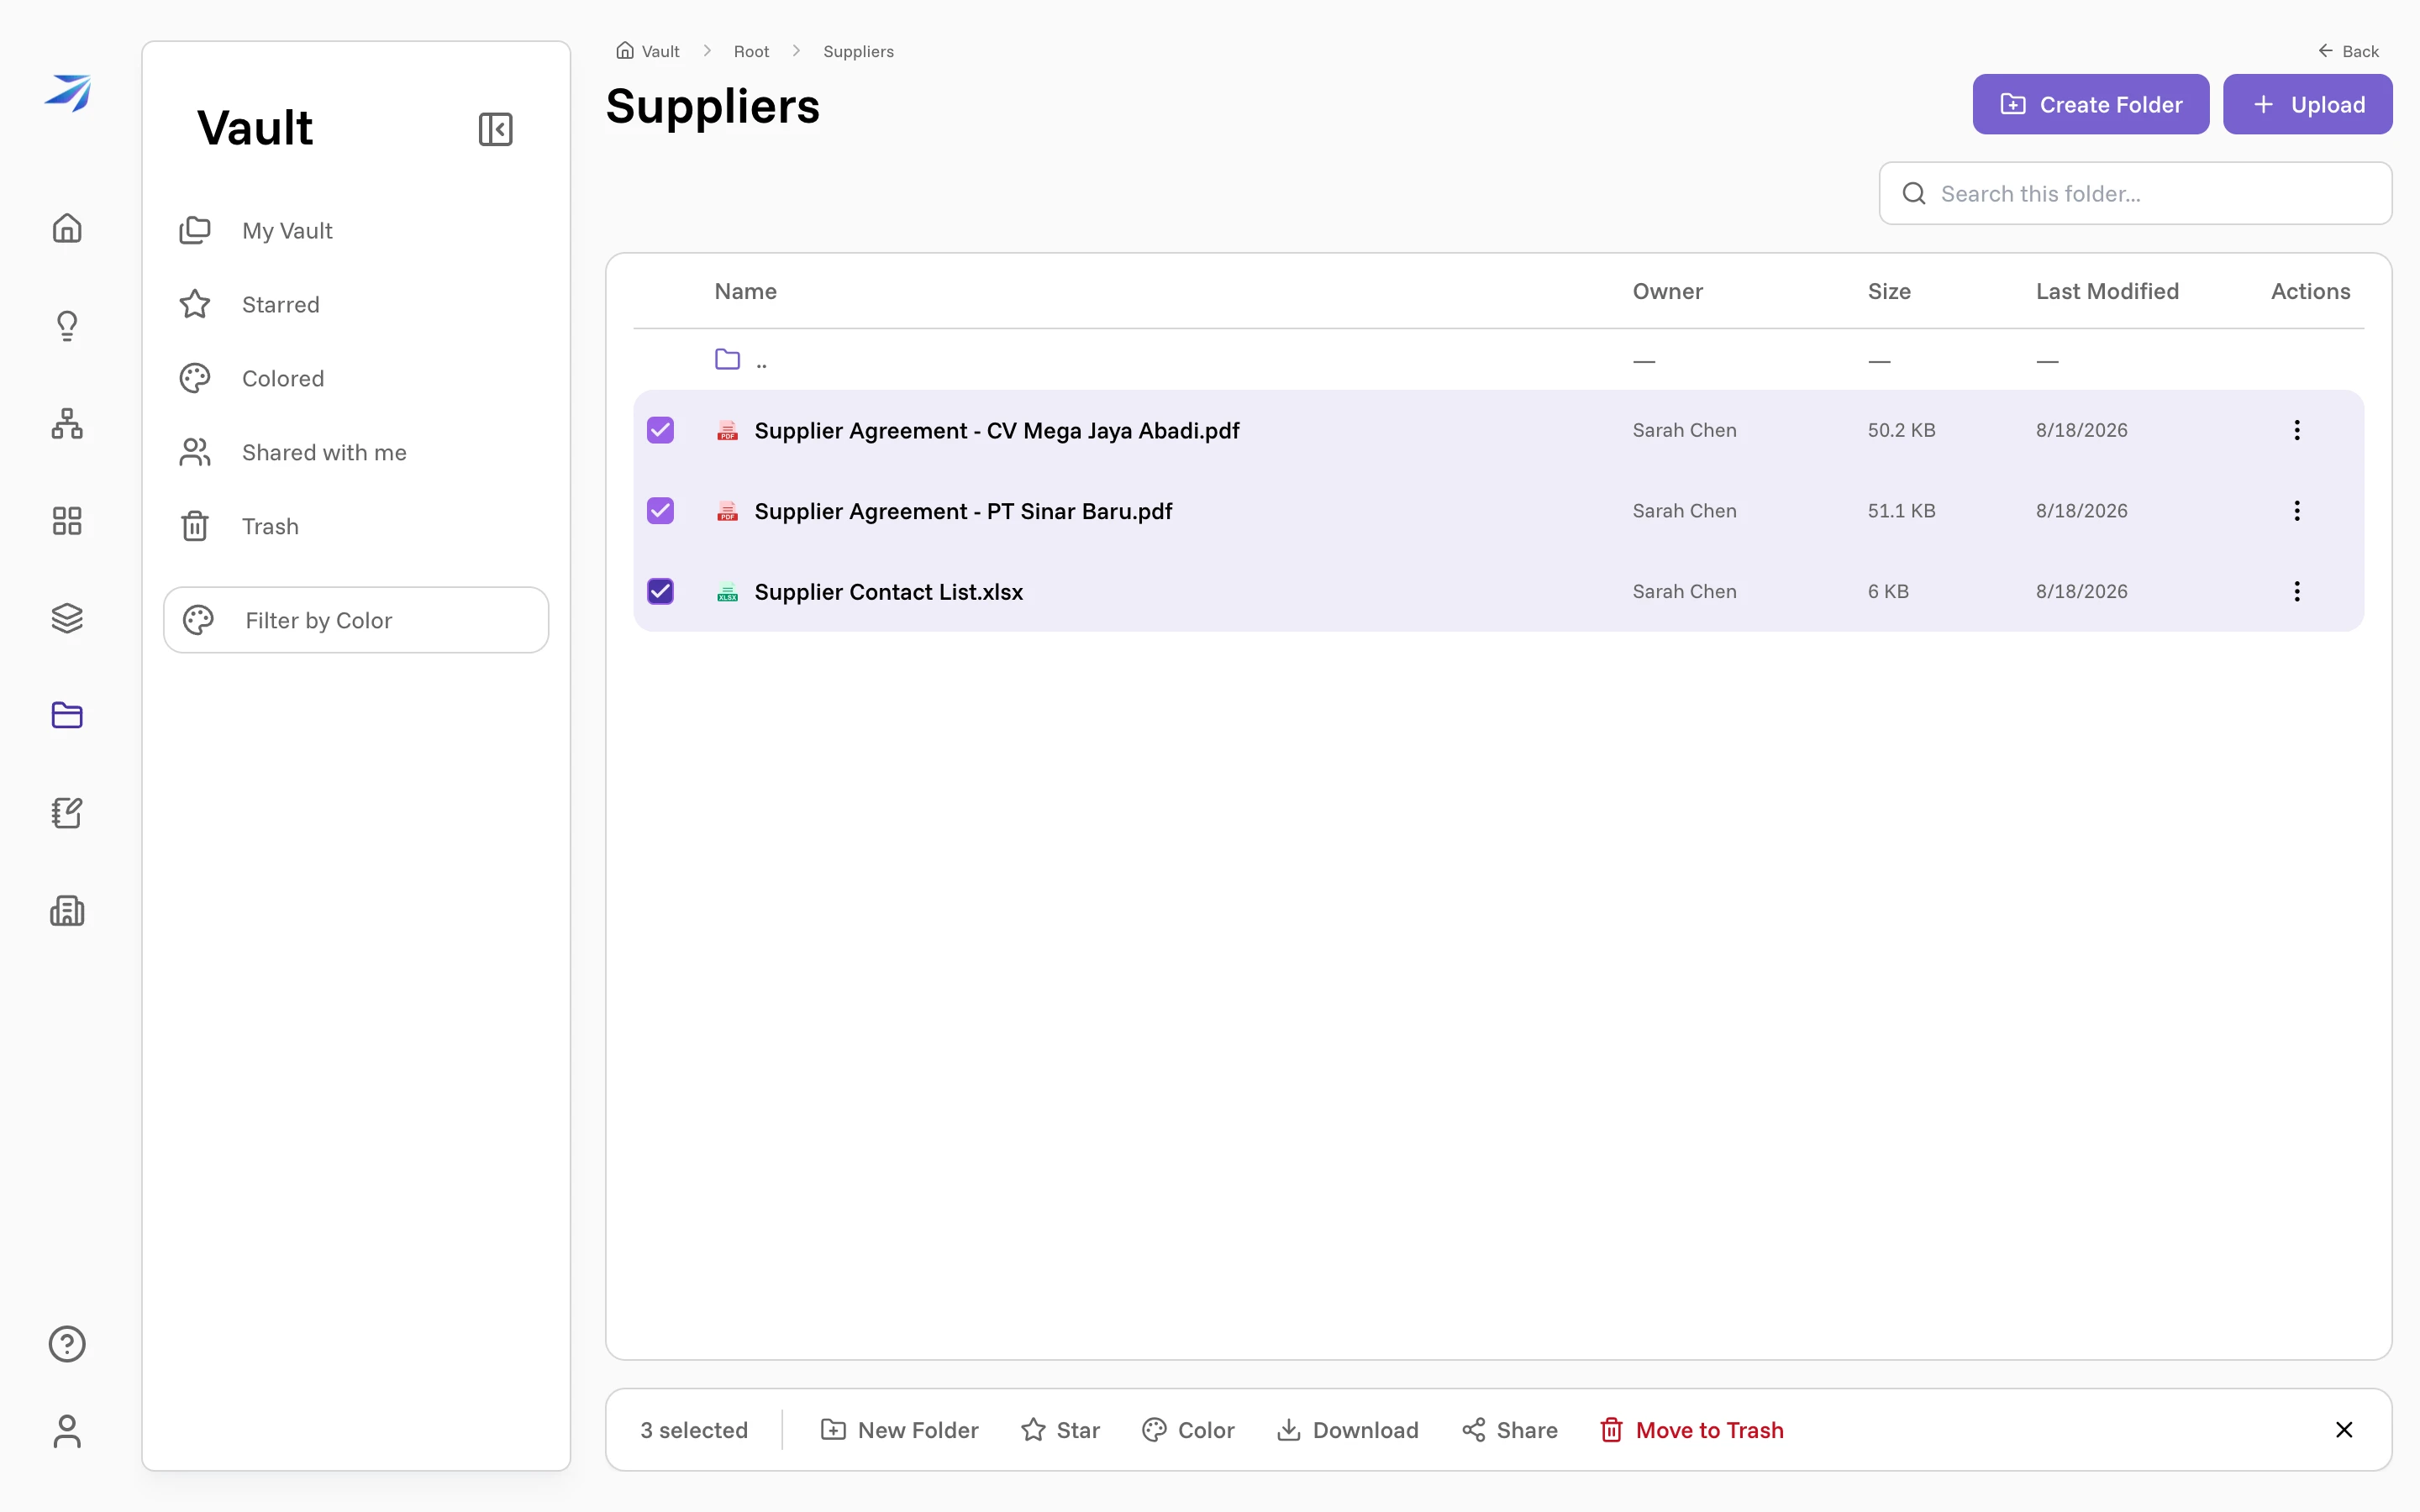
The × at the right end of the toolbar clears the selection.